Unable to create or clone on BlueStacks and looking for a Fix?
Then you are at the right place.
Bluestack is an excellent application which integrates Android applications with Windows OS. You can play Android games on a Windows desktop.
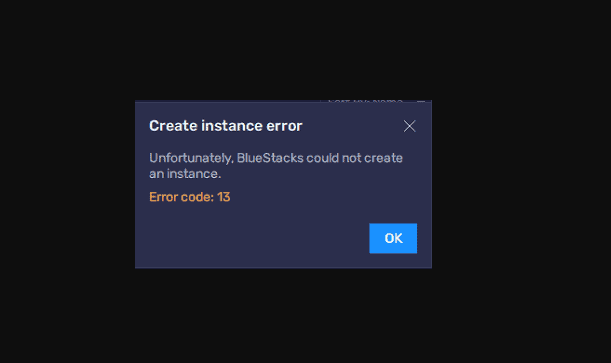
You will be stopped by following the error message when creating a new instance.
“Create Instance Error: Unfortunately, Bluestacks could not create an Instance. Error code 13.”
Usually, the error occurs when there is insufficient Memory, and it blocks to create new Instance.
What Causes The Bluestack Error Code 13?

Bluestack error code 13 means due to Insufficient Memory and corrupted files; you cannot launch or create a new instance on BlueStacks.
Other possible reasons are
- Insufficient RAM or Disk Space
- There is an issue with the Bluestack Application Itself
- You might not have the stable internet connection
- You may not enable the Virtualization.
How To Fix BlueStacks Error Code 13?
Before getting into the solution, ensure you have a stable Internet connection.
First, you need to Check your Internet connection and speed.
If you find any internet issues, do the following steps to regain your Internet connection.
- Power Off and Power On your Mobile data or the wifi
- If you are using Mobile data, switch to wifi or Vice versa
- Unplug and re-plug the internet cable in wifi router
- If the internet still has the issue, restarting the router will fix the issue.
Also, ensure that you have an active Data plan. If not, recharge it immediately.
If you have a good internet connection, the BlueStacks App still faces the problem; clear the temp files.
1. Clearing Temp And App Files
Deleting App data and Temp files will remove any glitches or corrupted histories in the system and help you create fresh new cache data when launching your Instance.
Please follow the instructions to remove your temp files, but don’t worry if some won’t delete.
- Type Run in the Windows search bar to open the run command box
- Type %temp% in the run input field and select all the files in the opened temp folder.
- Press Shift+Delete to delete all the files from the temp file.
- Again, run the application and input %AppData%.
- Find and locate the Bluestacks folder and delete it.
- Repeat the above step, typing %LocalAppData% in the input field in the Run command box.
- Find the Bluestacks folder and delete it.
- Go to Desktop and Empty your recycle Bin.
- Reboot your PC and Try creating a new instance.
- If the error persists, then check the Ram allocation in Bluestack
2. Increase RAM And Disk Space
To increase the RAM and Disk space,
- Launch the Bluestack application and Click on Settings in the sidebar.
- Click on the Performance tab from the Bluestack application.
- Where you will see the Memory Allocation and CPU allocation.
- Increase 1GB memory and 1 CPU core from the current allocation numbers by selecting the Custom option.
- Close your Bluestack application and relaunch it.
Try creating the new Instance and check if the error is gone.
3. Reinstall The Bluestack Application
If nothing above method works, then there is no issue with the Memory; you need to reinstall the BlueStacks application.
- Type Add or Remove program in the Windows search bar and click on it from the search list.
- The Program and application management setting page opens.
- Where find Bluestack and right-click on it to uninstall the Bluestack application.
- Repeat the first solution to Delete temp and app data files.
After doing this, please reboot your PC, then download and install our latest version here.

