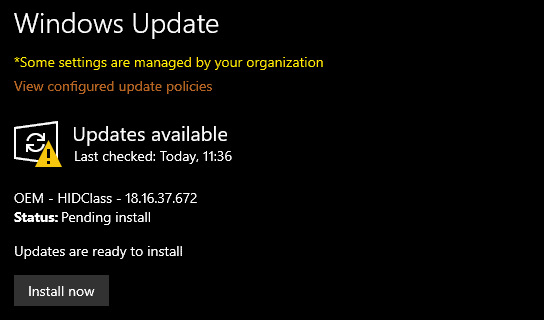
A few Microsoft clients have complained that they fail to install OEM HIDClass on their latest Windows versions.
Since this is an authorized Microsoft update, you can download the update on your PC with no worries. However, installing an update is not a tricky task, users can simply install the update themselves.
Whenever you switch on your laptop to install this update, and when you click to install, it shows no signs of installing.
If you are facing the same issue, then you are in the right place to learn how to fix this issue.
The same issue may have several root causes, but we’ll work with you to find a solution.
If you wish to set up OEM HIDClass on your PC, then you must carefully read this post to get acquainted with the causes and solutions to the error.
Why Is OEM HIDClass Not Installing?
This issue can be raised due to multiple reasons. Some of them are as follows:
- If the model or the Windows version of your PC is old and not updated to new ones, then it too can be seen as a hurdle in installation.
- Making any prior changes in your system’s settings before installing OEM HIDClass can create trouble.
- Furthermore, if you have logged in with a local account, it does create a problem, as OEM HIDClass is an official Microsoft update. So it is necessary to do the same with a Microsoft account.

How To Fix “OEM HIDClass Not Installing“?
Fix 1: Adhering To The Correct Installation Method
Every user, on the first hand, can fix this issue by following the step-by-step instructions that are mentioned below for installing OEM HIDClass on their Windows.
Window 10
Step 1: Go to the Setting and choose Update and Security.
Step 2: double-tap on the Windows Update option.
Step 3: Select the option of ‘Pause update for 7 days.’
Step 4: When you are done with this, tap on the ‘Resume Updates Tab’ in order to finish the process.
Step 5: Now it will get installed on your PC.
Window 11
Step 1: Click on the Start menu and select Settings
Step 2: Then tap on the Down arrow next to the Pause updates icon and choose a preferred option from the file that comes on your screen.
Step 3: After putting the update on halt, tap on ‘Resume updates’ to finish the procedure.
Step 4: Now it will get installed on your PC.
Fix 2: Log In With Microsoft Account
Users who want to install OEM HIDClass on their system, need to first sign out of their current login account and restart their system with a Microsoft account.
Fix 3: Do System Update
Users need to first upgrade their PC to the new version of Windows. They should also install every pending update on their system.
Updates are enhancements to the software that can improve the computing experience, assist in avoiding issues, and help in solving issues.
It improves the functioning of the machine as well. This too helps in the smooth installation of OEM HIDClass.
Fix 4: Reach Out For Technical Support
The last method that we suggest you follow to fix OEM HIDClass not installing issue is to contact Microsoft support.
The team will guide you with the complete troubleshooting and installation process.
Conclusion
OEM HIDClass not installing usually occurs when you are using an outdated version of OS or system.
Therefore, to install OEM HIDClass without any issues, ensure you have updated your system and OS.
Other than this, you will have to use your valid Microsoft account to install OEM HIDClass. Check the credentials and account again.
However, if any troubleshooting methods listed above were not helpful for you, you can contact Microsoft support.
The team will get back to you and will assist you with the complete troubleshooting process.
