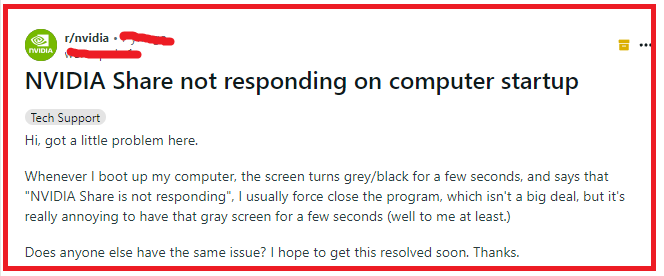
Are you encountering the frustrating issue of Nvidia Share not responding on your computer?
Fear not, as this guide is here to provide you with effective solutions to resolve the Nvidia Share not responding issue.
By following the steps outlined in this blog, you’ll be able to troubleshoot and fix this issue, ensuring that you can once again take full advantage of Nvidia Share’s features without any interruptions.

How To Fix Nvidia Share Is Not Responding?
To fix the issue of Nvidia Share not responding, you can roll back or update graphics drivers, disable Nvidia Share, and reinstall GeForce Experience. Moreover, you may also terminate background processes, and turn off instant replay.
Below is a detailed explanation of all the above-mentioned fixes:
1. Roll Back Or Update Graphics Driver
Outdated or corrupt graphics drivers can cause Nvidia Share to stop responding. You can update the graphics driver by following the steps provided.
Method 1: Update Graphics Driver Automatically (Recommended)
- Open the NVIDIA GeForce Experience application on your computer.
- Click on the “Drivers” tab.
- Click on “Check for Updates.“
- If an update is available, click on “Download” and then “Install.”
- Follow the on-screen instructions to complete the installation process.
Method 2: Update Graphics Driver Manually
- Go to the NVIDIA website: https://www.nvidia.com/Download/index.aspx.
- Select your graphics card type, series, and operating system.
- Click on “Search.”
- Download the latest driver version for your graphics card.
- Once the download is complete, double-click on the downloaded file to start the installation process.
- Follow the on-screen instructions to complete the installation process.
2. Disable Nvidia Share
If updating the graphics driver does not resolve the issue, you can try disabling Nvidia Share. If the problem goes away after disabling Nvidia Share, you can choose to leave it disabled or try re-enabling it later.
To disable NVIDIA Share, follow these steps:
- Open GeForce Experience by either clicking the system tray icon or searching for it in the Start menu.
- Click the Settings icon at the top right corner.
- In the left pane, click GENERAL and turn off SHARE in the right pane
3. Uninstall And Reinstall GeForce Experience
Uninstalling and reinstalling GeForce Experience can sometimes resolve issues with Nvidia Share.
Uninstall GeForce Experience (Windows):
- Open the Start menu and search for “Apps & features.”
- Locate “GeForce Experience” in the list of installed apps.
- Select “GeForce Experience” and click on “Uninstall.”
- Follow the prompts to complete the removal process.
Reinstall GeForce Experience (Windows):
- Visit the official NVIDIA GeForce Experience download page: https://www.nvidia.com/en-us/geforce/geforce-experience/.
- Find the appropriate download link based on your operating system (e.g., Windows).
- Install the new version of GeForce Experience using the provided installation file.
- Launch GeForce Experience once the installation is complete.
4. Terminate Background Processes
Ensure that you are running Nvidia Share with administrative rights and terminate any background Nvidia processes.
To terminate background Nvidia processes:
- press “Ctrl + Shift + Esc” on your keyboard to directly open the Task Manager.
- Once Task Manager is open, click on the “Processes” tab.
- Scroll through the list of processes and look for any processes that are related to Nvidia.
- Right-click on the Nvidia process that you want to terminate and select “End Task” from the context menu.
5. Turn Off Instant Replay
Turning off Instant Replay can also help resolve the issue.
To turn off Instant Replay in NVIDIA GeForce Experience, follow these steps:
- Open GeForce Experience by clicking on its icon in the system tray or searching for it in the Start menu.
- Once GeForce Experience is open, press the Alt + Z keys on your keyboard to bring up the in-game overlay.
- In the overlay menu that appears, locate and click on the “Instant Replay” icon. It usually looks like a camera or video camera.
- Within the Instant Replay settings, you will see an option to toggle Instant Replay on or off. Click on the toggle switch to turn it off.
- Confirm your action when prompted to disable Instant Replay.
- Close the GeForce Experience overlay by pressing Alt + Z again or clicking outside of the overlay window.
6. Contact NVIDIA Support

If none of the above solutions work, consider reaching out to NVIDIA support.
They may guide you with better options and help you resolve your issue better.
