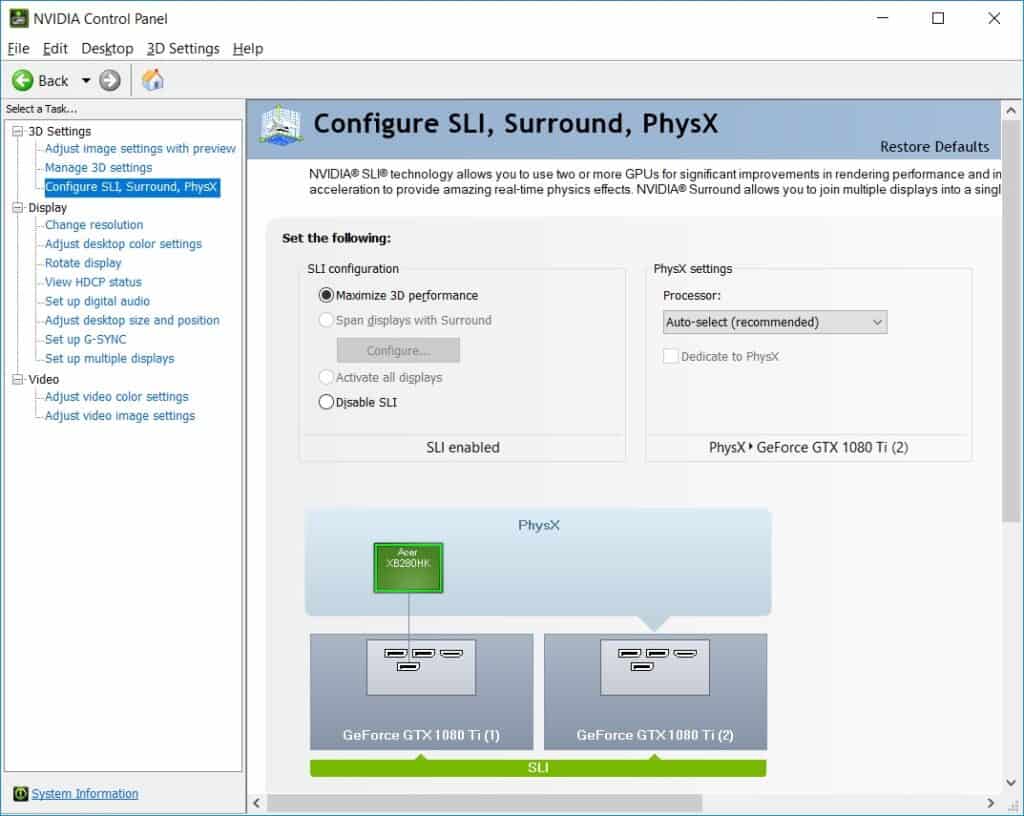
The NVIDIA Control Panel is important for people with NVIDIA graphics cards to adjust and make their graphics work better.
Sometimes, there’s a problem where only the 3D settings show up, and users can’t use other important things.
This article will help you understand why this happens and give you clear steps to solve it.
Why Nvidia Control Panel Only Shows 3D Settings?
Sometimes, NVIDIA Control Panel showing only 3D settings is common and can happen for different reasons.
One is if your main graphics card is set to an integrated one, usually for other display setups, which could limit the Control Panel to 3D options.

Also, the integrated card might control some display settings, reducing choices in the NVIDIA Panel.
Occasionally, bugs in the Control Panel could cause this, but restarting it usually helps fix the issue.
How To Fix Nvidia Control Panel Only Shows 3D Settings?
Here are a few possible solutions you can explore to solve your problem:
1. Restart NVIDIA Control Panel
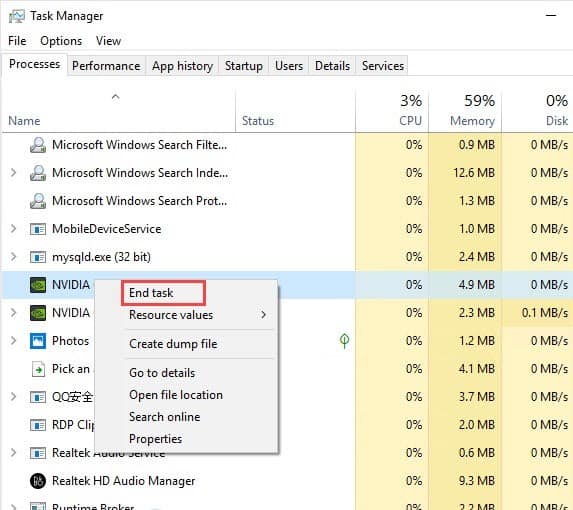
To address the issue of the NVIDIA Control Panel displaying only 3D settings, you can restart the Control Panel by ending its task in the Task Manager.

Here are the steps to restart the NVIDIA Control Panel by ending the task in the Task Manager:
- Right-click on the taskbar or press Ctrl + Shift + Esc to open Task Manager.
- In the Processes or Details tab, find and select the NVIDIA Control Panel process, then click “End Task.”
- Right-click on the desktop and select “NVIDIA Control Panel.”
- Verify if the Control Panel displays all settings, not just 3D settings.
2. Update Your Graphics Card Driver
If graphics drivers are outdated or incompatible, the Control Panel may malfunction due to compatibility and performance issues.
Here are the steps to update your GPU Drivers:
- Open Control Panel, select “Device Manager.”

- Expand “Display adapters,” right-click your graphics card, and choose “Update Driver Software.”
- Opt for automatic online updates or locate your model on the manufacturer’s website for manual download.
- Follow provided instructions to install the latest driver and restart your computer.
3. Configure Unique 3D Settings For Applications And Games
Use the NVIDIA Control Panel to make graphics better for each program, making things look and work nicer.
You can adjust settings so each thing you use looks and runs its best.
Here are the steps to do so:
- Open the NVIDIA Control Panel on your computer.
- From the navigation tree pane, under 3D Settings, select Manage 3D settings.
- Click the Program Settings tab.
- Under Select a Program to Customize, click the list arrow and then select the game or application for which you want to customize the preset 3D settings.
- If the game or application is not listed, click the Add button and then browse to locate the game or application that you want to add, then click Open.
- If you want the list to show only those games or applications that are installed on your system, check the Show only programs found on my computer check box.
- Adjust the settings as needed for each listed feature.
- Click the Apply button to save the changes.
4. Disable The Integrated GPU
At times, the basic graphics card handles parts of how the computer’s screen looks, and you can solve this by turning off the basic one and updating the main graphics card’s software.
To disable the integrated GPU, you can follow these steps:
- Open the Start menu and type “Device Manager” into the search box.
- Select “Device Manager” from the search results.
- In the Device Manager window, expand the “Display adapters” category.
- Right-click on the integrated graphics card and select “Disable device”.
5. Set Default 3D Settings
You can resolve the problem by making changes to the default 3D settings within the NVIDIA Control Panel, which is done by accessing the “Manage 3D settings” option, and then selecting the Global Settings tab.
To set default 3D settings using the NVIDIA Control Panel, you can follow these steps:
- Open NVIDIA Control Panel.
- Under 3D Settings, choose Manage 3D Settings.
- Click the Global Settings tab to set overall preferences for all 3D games.
- Adjust specific settings by selecting features and values from drop-down lists.
- Restore defaults by clicking the Restore button on the Global Settings tab or adjacent to the Global Presets list for workstation products.
