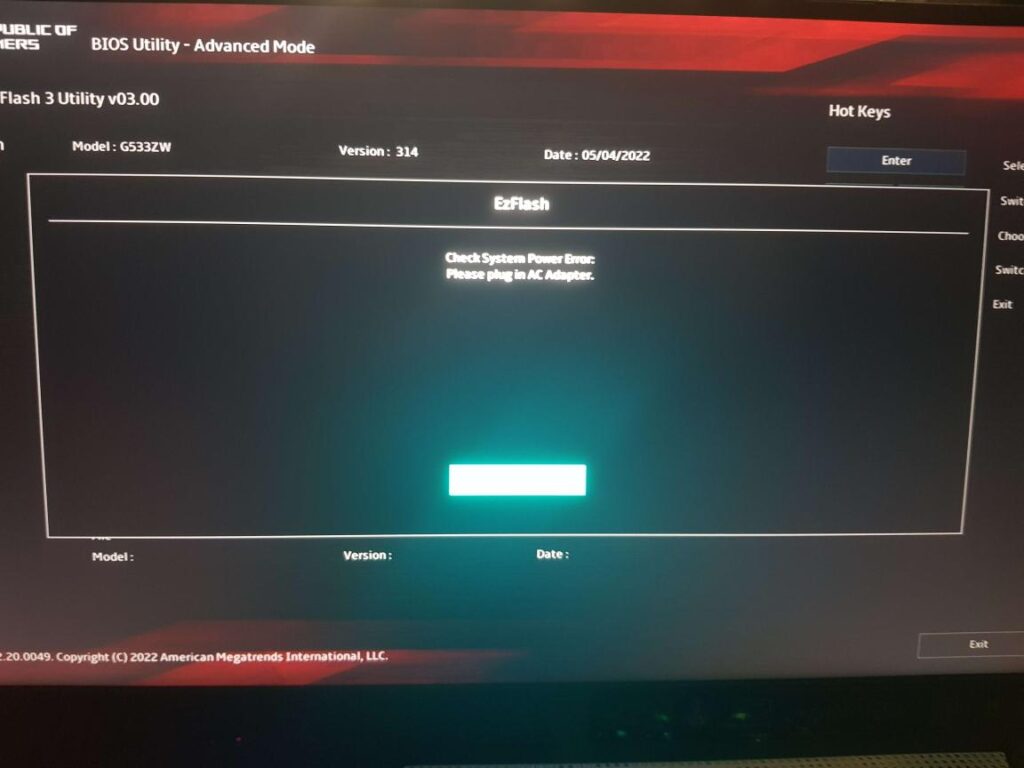
Are you encountering the frustrating “Check System Power error” message on your ASUS ROG Ally?
This issue can be perplexing, but fear not! The error message reads as “Check System Power Error: Please plug in AC Adapter.”
In this comprehensive guide, we will explore effective methods to resolve the “Check System Power error” on your ASUS ROG Ally.
How To Fix ASUS ROG Ally Check System Power Error?

To fix ASUS ROG Ally check system power error, you can perform a hard reset, ensure AC adapter is connected, and update BIOS. Additionally, you can check battery health.
1. Perform A Hard Reset
A hard reset can resolve the ‘Check system power error’ by discharging residual power, which may be causing the system to misread the power status.
This process can reset the system’s hardware and clear out any temporary configurations that could be contributing to the error.
- Turn off your ASUS ROG Ally and disconnect the AC adapter.
- Remove the battery if it is removable.
- Press and hold the power button for 60 seconds to discharge any residual power.
- Re-insert the battery and connect the AC adapter.
- Power on the laptop to see if the error has been resolved.
2. Ensure AC Adapter Is Connected
The error may occur if the system does not detect the AC adapter.
Ensuring the adapter is connected properly can provide the necessary power the system needs to bypass the error.
- Connect your AC adapter to the ASUS ROG Ally.
- Check the AC adapter and the power port on your laptop for any signs of damage.
- Ensure the connection is secure and the power indicator on the laptop is on.
- Attempt to update the BIOS again to see if the error persists.
3. Update BIOS
Updating the BIOS can resolve compatibility issues and bugs that might cause the ‘Check System Power error’.
It’s important to ensure that the laptop is connected to a power source during this process to prevent any interruptions that could damage the system.
- Connect your ASUS ROG Ally to the AC adapter to ensure an uninterrupted power supply.
- Boot into the BIOS setup by pressing the appropriate key during startup (commonly F2, DEL, or ESC).
- Navigate to the EZ Flash utility within the BIOS setup.
- Select the option to update the BIOS and follow the on-screen instructions to complete the process.
4. Check Battery Health
If the battery is failing or not holding a charge, it could lead to power errors. Checking the battery’s health can determine if it needs to be replaced.
- Boot into the operating system and search for the battery health status in the system settings or use a third-party application.
- If the battery health is poor or the battery is not detected, consider replacing the battery with an OEM replacement.
- After replacing the battery, check to see if the ‘Check System Power error’ is resolved.
5. Contact ASUS Support

If all else fails, reaching out to ASUS support can provide you with professional assistance.
They can offer more in-depth troubleshooting steps or repair services.
- Visit the official ASUS support website.
- Enter the details of your ASUS ROG Ally to find relevant support options.
- Follow the instructions provided by ASUS support for further troubleshooting or to arrange for a repair if necessary.

