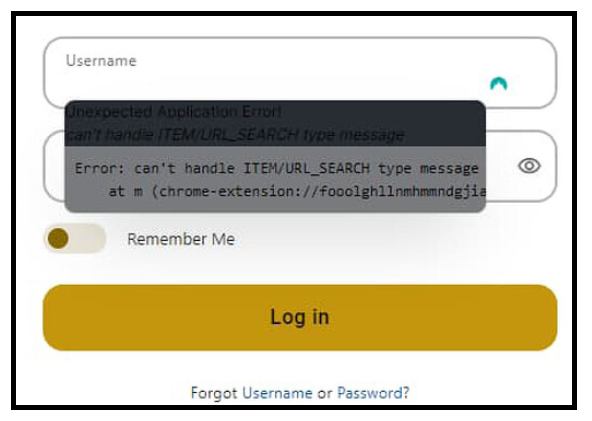
When encountering the “can’t handle ITEM/URL_SEARCH” error in NordPass, it’s typically indicative of an issue within the browser extension or the communication between the extension and the main NordPass application.
This error can prevent you from using NordPass effectively, as it may not autofill passwords or search for stored items correctly.
The full error message will read “unexpected application error, can’t handle ITEM/URL_SEARCH type message” at “m (chrome extension://foooolgh11nmhmmndgjie”.
In this article, we will discuss solutions for the error “NordPass Error: Can’t Handle ITEM/URL_SEARCH” which will help you to fix the issue with ease.

How To Fix NordPass Error: Can’t Handle ITEM/URL_SEARCH?
To fix NordPass Error: Can’t Handle ITEM/URL_SEARCH, you can check for NordPass updates, relogin into your account and reinstall the NordPass extension. You can also check for conflicting software and disable the firewall to fix the issue.
1. Check For NordPass Updates
Ensure that your NordPass extension and desktop application are up to date. Developers often release patches and updates to fix known bugs and improve performance.
You can check for updates in the extension and app settings or visit the NordPass website for the latest version.
2. Re-login To Your NordPass Account
Logging out and then back into your account can sometimes refresh your session and resolve errors:
- Click on the NordPass extension icon and log out from your account.
- After logging out, log back in with your Master Password.
3. Uninstall And Reinstall The NordPass Extension
If the error persists, try reinstalling the NordPass extension:
Google Chrome:
To Uninstall:
- Open Chrome and click on the three dots in the upper-right corner to open the menu.
- Go to “More tools” and then select “Extensions”.
- Find the NordPass extension in the list.
- Click on “Remove” to uninstall the NordPass extension from Chrome.
To Reinstall:
- Visit the Chrome Web Store.
- Search for “NordPass” in the store.
- Find the NordPass extension and click on “Add to Chrome”.
- A dialog will appear asking for confirmation. Click “Add extension” to proceed.
Mozilla Firefox:
To Uninstall:
- Open Firefox and click on the three horizontal lines in the upper-right corner to open the menu.
- Click on “Add-ons” (or you can press
Ctrl+Shift+Aon your keyboard). - In the Add-ons Manager tab, select “Extensions”.
- Find NordPass and click on the three dots next to it, then select “Remove”.
To Reinstall:
- Go to the Firefox Add-ons site.
- Search for “NordPass”.
- Click on “Add to Firefox” next to the NordPass extension.
- Confirm the installation by clicking “Add” in the prompt that appears.
Microsoft Edge:
To Uninstall:
- Open Edge and click on the three dots in the upper-right corner to open the menu.
- Select “Extensions”.
- Find the NordPass extension and click on the “Remove” button.
To Reinstall:
- Go to the Microsoft Edge Add-ons page.
- Search for “NordPass”.
- Click on “Get” to install the NordPass extension.
- Confirm any prompts that appear to complete the installation.
Safari (macOS):
To Uninstall:
- Open Safari and click on “Safari” in the menu bar at the top of the screen, then select “Preferences”.
- Go to the “Extensions” tab.
- Find NordPass and click on “Uninstall”.
To Reinstall:
- Visit the NordPass website to download the latest version of the NordPass extension for Safari. 2. Once downloaded, open the file (usually a
.safariextzor.appextension). - Safari will prompt you with a dialog asking if you want to install the extension. Click “Install”.
- If required, enable the extension: Go back to Safari’s “Preferences” under the “Extensions” tab, and make sure the checkbox next to NordPass is ticked.
4. Check For Conflicting Extensions
Other browser extensions, particularly other password managers, can conflict with NordPass:
- Disable other extensions one by one to identify if there is a conflict.
- If the issue resolves after disabling a particular extension, you may need to keep it disabled or remove it to use NordPass effectively.
5. Use The Desktop App
If the browser extension continues to have issues, consider using the NordPass desktop application for the time being:
- The desktop app can be downloaded from the NordPass website and offers the same functionality without relying on your browser. This can serve as a temporary workaround while you troubleshoot the browser extension issue.
6. Disable Antivirus Or Firewall Temporarily
In rare cases, antivirus or firewall settings may interfere with NordPass. Temporarily disable your antivirus or firewall to see if it resolves the issue.
For Windows Defender Antivirus And Firewall (Windows 10/11):
- Disable Windows Defender Antivirus:
- Click on the Start menu and type in “Windows Security” to find and select the app.
- Navigate to “Virus & threat protection” in the left-hand menu.
- Click on “Manage settings” under “Virus & threat protection settings.”
- Toggle off the switch under “Real-time protection” to disable the antivirus temporarily.
- Disable Windows Firewall:
- Open the Control Panel and go to “System and Security,” then select “Windows Defender Firewall.”
- On the left-hand side, click on “Turn Windows Defender Firewall on or off.“
- Choose the “Turn off Windows Defender Firewall (not recommended)” option for both private and public network settings.
- Click “OK” to save the changes.
For Third-Party Antivirus Software:
The steps for disabling third-party antivirus software can vary depending on the program you are using. Generally, you can follow these steps:
- Locate the antivirus icon in the system tray on the taskbar (usually at the bottom-right corner of the screen).
- Right-click on the antivirus icon.
- Look for an option that says “Disable,” “Stop,” “Turn Off,” or something similar. This might be directly in the right-click menu or within a submenu.
- Select the time period for which you want to disable the antivirus if prompted. Some programs allow you to choose how long the antivirus will remain disabled before it reactivates automatically.
For MacOS (Disabling Firewall):
- Click on the Apple menu and select “System Preferences.”
- Click on “Security & Privacy.”
- Select the “Firewall” tab.
- Click the padlock icon at the bottom left to make changes (you may need to enter your administrator password).
- Click “Turn Off Firewall” to disable it temporarily.
7. Contact NordPass Support

If none of the above steps work, it’s time to reach out to the NordPass customer support team:
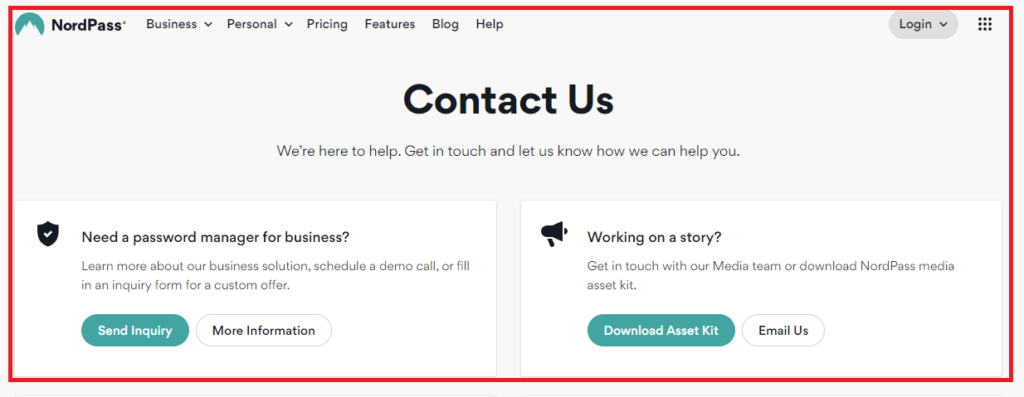
- Visit the NordPass support website and submit a request for help.
- Provide detailed information about the issue, including the exact error message, and the troubleshooting steps you’ve already taken.
