Are you ready to run your own Enshrouded game server? Great! Setting up a dedicated server for Enshrouded might seem tricky, but don’t worry.
I’m here to help you through the process step by step. By the end of this guide, you’ll have your own server up and running, and you’ll be ready to invite friends or other players to join in on the fun.
So, let’s get started on this adventure and create a place where you can play Enshrouded your way!
How To Set Up An Enshrouded Dedicated Server
Step 1: Download And Install SteamCMD
First things first, you’ll need SteamCMD, Steam’s command-line interface tool.
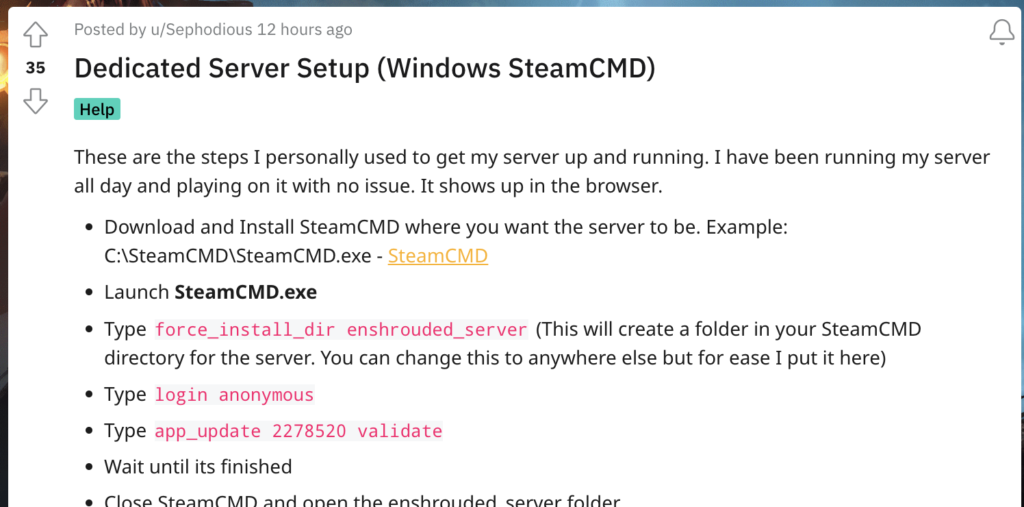
Download and install SteamCMD to a directory of your choice, such as C:\SteamCMD\SteamCMD.exe.
This tool is essential for downloading the Enshrouded server files.
Step 2: Launch SteamCMD
Open SteamCMD.exe. The first time you run it, SteamCMD will update itself. Once it’s done, you’ll be at a command prompt, ready for the next steps.
Step 3: Set Up Server Directory
In the SteamCMD command prompt, type force_install_dir enshrouded_server.
This will create a new folder in your SteamCMD directory dedicated to your Enshrouded server. You can customize the location if you prefer a different directory.
Step 4: Anonymous Login
Type login anonymous in SteamCMD. This allows you to download and update the server without using a personal Steam account.
Step 5: Download The Server
Now, input app_update 2278520 validate to download the Enshrouded server files. Wait for the process to complete before moving on.
Step 6: Initial Server Setup
Close SteamCMD and navigate to the enshrouded_server folder you created. Run enshrouded_server.exe and wait about a minute to allow all necessary files to populate. Then, close the server.
Step 7: Configure The Server
Open the enshrouded_server.json file with a text editor of your choice. This is where you will set your server name and password.
Note on IP Settings: Do not use your public IP here. This field is for the local PC IP hosting the server. Usually, setting it to 0.0.0.0 is fine unless you have multiple people on the same network launching the game. In that case, use your LAN IP (found via ipconfig /all in the command prompt).
Port Settings: You can change the default ports, but ensure that the QueryPort is exactly one number higher than your Port (e.g., Port 2222, QueryPort 2223).
Step 8: Port Forwarding And Firewall
Forward the ports you set in your router settings and adjust your firewall to allow both UDP and TCP connections. Windows might prompt you to do this when you run the server, but if not, add the rules manually in “Advanced Firewall Settings” under “New Rule” for the application.
Step 9: Launch The Server
Run enshrouded_server.exe again. You should see messages like [Session] 'HostOnline' (up)! indicating the server is online and operational.
Step 10: Joining The Server
Open Enshrouded, go to Join Game, and use the server search function to find your server by the name you set.
Be patient; it might take a few minutes for your server to appear in the list. If it doesn’t show up, check your port forwarding settings and ensure your server and game versions match.


