YouTube is a sophisticated platform that handles billions of video uploads.
For your video to be successfully uploaded and streamed, it undergoes a process known as ‘processing.’
During processing, YouTube converts your video into a format that can be streamed smoothly across various devices and internet speeds.
However, if there’s an issue with the video file or the upload conditions, YouTube may abandon this processing stage.
This results in the error message “Processing Abandoned, The Video Could Not Be Processed.”
An error during a YouTube upload can be frustrating, particularly when the error message reads, “Processing Abandoned The Video Could Not Be Processed”.
In this guide, we’re going to explain what “Processing Abandoned The Video Could Not Be Processed error message means and how you can fix it.
Understanding “Processing Abandoned The Video Could Not Be Processed” Error
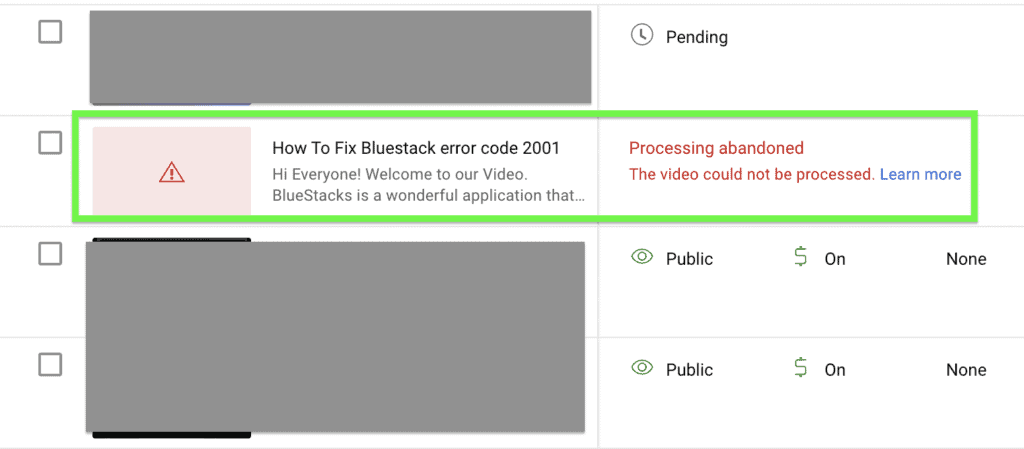
The “Processing Abandoned The Video Could Not Be Processed” error typically occurs when YouTube encounters an issue with the video file during the upload process.
This could be due to several factors, including:
- Corrupted or Unsupported File: If the video file is damaged or in an unsupported format, YouTube won’t be able to process it.
- Insufficient Upload Speeds: Slow internet connection speeds can interrupt the upload process.
- VPN Usage: If you’re using a VPN during upload, it may interfere with the process due to speed limitations or connectivity issues.
- Shortened Video File: If the video file is abruptly shortened, YouTube may fail to process it.
How To Fix “Processing Abandoned The Video Could Not Be Processed” On YouTube
Step 1: Validate Your Video File
The first thing you should do is verify if your video file is functioning correctly. An easy way to do this is by playing back the video on your device.
If the video plays smoothly without glitches, it’s likely not corrupted.
If the video doesn’t play or is choppy, the file may be damaged and might need repair using video editing software or be replaced with a valid file.
Step 2: Ensure The Video File Is In A Supported Format
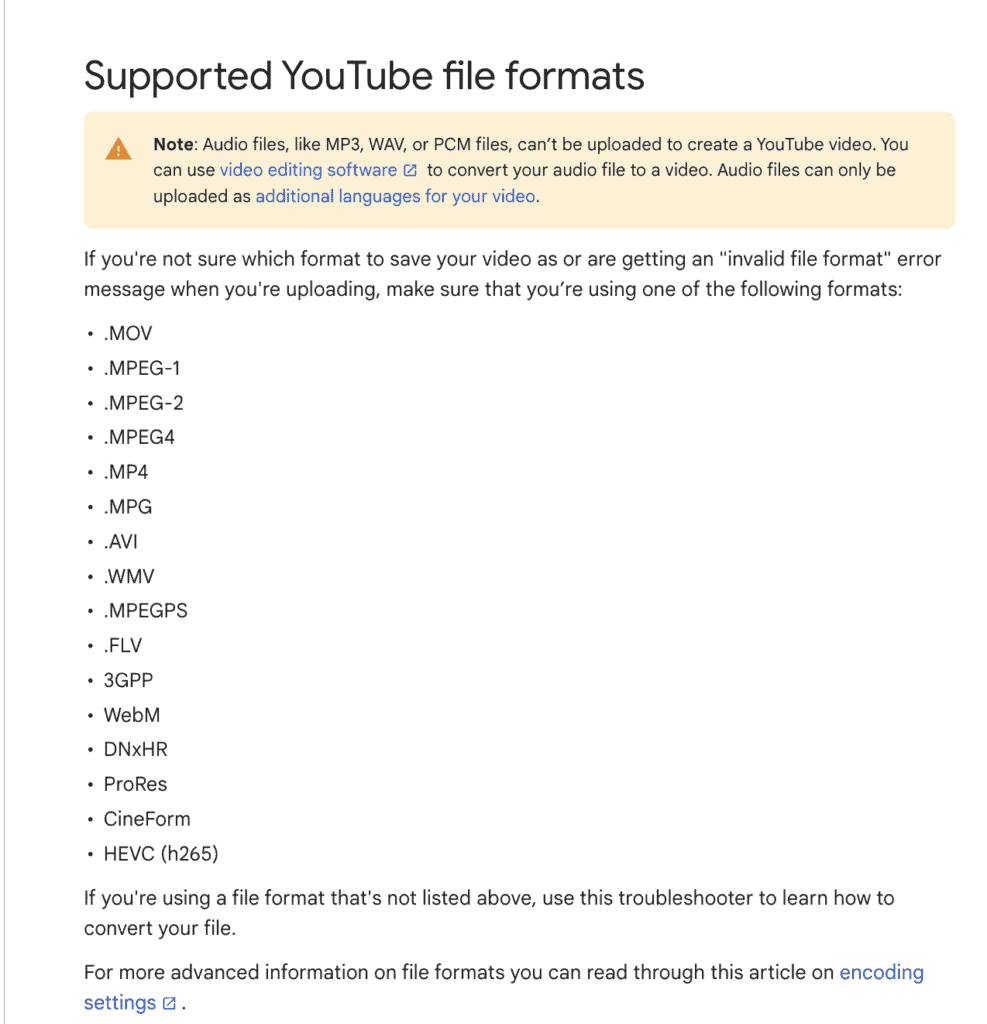
YouTube can process many different file formats. These include .MOV, .MPEG4, .AVI, .WMV, .MPEG-PS, .FLV, 3GPP, WebM, DNxHR, ProRes, CineForm, and HEVC (h265).
If your video file isn’t in one of these formats, you’ll need to convert it using video conversion software.
This step is critical as an unsupported file format can lead to processing errors.
Step 3: Verify Your Internet Connection
A stable and high-speed internet connection is key to successful video uploads on YouTube.
If you’re uploading a large file or your connection is unstable, it can lead to interrupted uploads and processing errors.
If you’re experiencing slow internet speeds, consider these options:
- Reset your router: Sometimes, a simple reset can resolve connection issues.
- Switch to a wired connection: Wired connections, like Ethernet, often provide faster and more stable internet compared to Wi-Fi.
- Upgrade your internet plan: If your internet speed is generally slow, consider upgrading your plan for higher upload speeds.
Step 4: Disable VPN During Upload
If you’re using a VPN while uploading, it can sometimes affect your connection speed or stability.
Consider disabling your VPN before you start the upload process, and enable it again once the upload is complete.
Step 5: Try Uploading From A Different Browser Or Device
Sometimes, the issue might lie with the browser or device you’re using to upload.
Some browsers or devices may have settings or extensions that interfere with the upload process.
Try using a different browser or device to upload your video.

