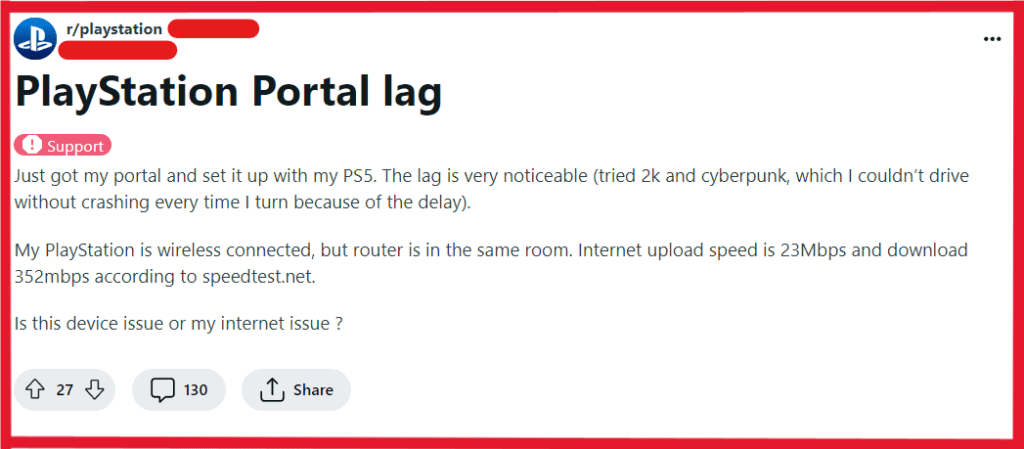
Are you experiencing frustrating lag and performance issues while using your PlayStation Portal? If so, you’re not alone.
Many gamers encounter these challenges, but the good news is that there are effective solutions available to address these issues and optimize your gaming experience.
In this article, we will explore proven methods to tackle PlayStation Portal lagging and performance issues, providing you with practical steps to improve your gaming experience.
How To Fix PlayStation Portal Lagging & Performance Issues?

To fix PlayStation portal lagging and performance issues you can check network connection, switch to 5 ghz spectrum, establish an ethernet connection. Additionally, power cycle your console, restart both PS console and portal, check power settings, update settings on PS control, contact customer support.
1. Check Network Connection
Start by ensuring that your network connection is stable. High internet ping can often cause lag. You can troubleshoot this by restarting your modem or router to clear any congestion in your Wi-Fi network.
Here are the steps to check the network connection on your PlayStation console:
- From the main menu, navigate to “Settings” and select “Network.”
- Choose “Test Internet Connection” to diagnose any potential network issues.
- Review the test results for download/upload speeds, NAT type, and any reported issues.
- If any issues are identified, follow the on-screen prompts to troubleshoot and resolve them.
- Consider restarting your modem and router if the network test indicates connectivity problems.
- If using a wireless connection, ensure that the console is within range of the Wi-Fi signal and that there are no physical obstructions blocking the signal.
2. Switch To 5 GHz Spectrum
If you’re using a Wi-Fi connection, consider switching to the 5 GHz spectrum, which can provide a more stable and faster connection, thus reducing lag.
Here are the steps to switch to the 5 GHz spectrum on your router for your PlayStation console:
- Access your router’s settings by entering the router’s IP address into a web browser and logging in with your administrator credentials.
- Locate the wireless settings or Wi-Fi configuration section within the router’s interface.
- Look for the option to separate the 2.4 GHz and 5 GHz bands or to specifically enable the 5 GHz band.
- Enable the 5 GHz band and save the changes within the router’s settings.
- Once the changes are saved, reconnect your PlayStation console to the 5 GHz Wi-Fi network.
- Verify the connection by performing a network test on your console to ensure it is now utilizing the 5 GHz spectrum.
3. Establish An Ethernet Connection
For a more stable and reliable connection, consider hardwiring your PlayStation Portal to your LAN using an Ethernet cable. This can significantly reduce input lag and improve overall performance.
Here are the steps to establish an Ethernet connection for your PlayStation console:
- Acquire an Ethernet cable if you don’t already have one.
- Locate an available Ethernet port on your router or modem.
- Connect one end of the Ethernet cable to the Ethernet port on your router or modem.
- Locate the Ethernet port on your PlayStation console.
- Connect the other end of the Ethernet cable to the Ethernet port on your PlayStation console.
- Once connected, your PlayStation console should automatically detect the wired connection.
- Verify the connection by performing a network test on your console to ensure it is now utilizing the Ethernet connection.
4. Power Cycle Your Console
Power cycling your PlayStation Portal can sometimes help in addressing lagging and performance issues. Turn off the console, unplug it from the power source, wait for a few minutes, and then restart it. This can help resolve certain technical glitches that may be causing the lag.
Here are the steps to power cycle your console:
- Ensure that all active applications and games are closed to prevent data loss or corruption.
- Press and hold the power button on the front of your console until the system powers down completely.
- Once the console is fully powered off, unplug the power cable from the back of the console.
- Wait for at least 1-2 minutes to allow the system to completely discharge and reset.
- After the waiting period, plug the power cable back into the console.
- Power on your console and check to see if the performance issues have been resolved.
5. Restart Both PS Console And Portal
A simple restart can often resolve performance issues. Turn off both your PS console and the PlayStation Portal, then power them back on to see if this resolves the lagging and performance issues.
Here are the steps to restart both your PS console and portal:
- Turn off your PS console using the power options in the system menu.
- Unplug the power cable from the back of the console.
- Wait for 1-2 minutes to ensure a complete power cycle.
- Unplug the power cable from your PlayStation Portal.
- Plug both the PS console and the PlayStation Portal back in.
- Power on your PS console and the PlayStation Portal.
- Check to see if the lagging and performance issues have been resolved.
6. Check Power Settings
Ensure that the power settings on your PlayStation console are optimized for performance. Adjusting power settings may help in improving the overall performance and reducing lag.
Here are the steps to check the power settings on your PlayStation console:
- From the main menu, navigate to the “Settings” option.
- Select “System” from the settings menu.
- Choose “Power Saving” or “Power Options” to access the power settings.
- Review the power settings to ensure they are optimized for performance.
- Make any necessary adjustments to the power settings to enhance performance.
- Save the changes and exit the settings menu.
7. Update Settings On PS Control
Take a look at the settings on your PS Control and ensure they are configured optimally for the best performance. This includes checking settings related to input sensitivity and responsiveness.
Here are the steps to update settings on your PS Control:
- Press the PlayStation button on your controller to access the quick menu.
- Navigate to “Settings” using the directional buttons.
- Select “Accessories” and choose “Controllers” to access the controller settings.
- Review and update the settings as needed, such as input sensitivity and responsiveness.
- Save any changes made to the settings.
- Exit the settings menu and return to your game or the main menu.
8. Contact Customer Support

If you have tried the aforementioned troubleshooting steps and are still experiencing issues with your PlayStation console, consider reaching out to customer support for further assistance.
They can provide personalized guidance and additional troubleshooting steps to address the specific issues you are encountering.

