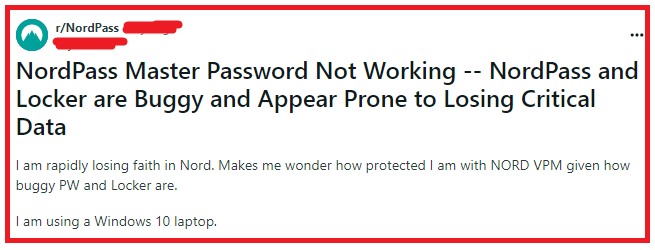
If you’re encountering issues with your NordPass Master Password not working, it can be a distressing experience since the Master Password is the key to accessing your vault. However, there are several steps you can take to troubleshoot and resolve the issue.
In this article, we will be discussing the fixes that will help you to fix the issue of “NordPass master password not working” without any hassle.

How To Fix NordPass Master Password Not Working?
To fix NordPass master password not working, you can check for typing errors, use the correct master password and reset the password. Additionally, you can also make sure that the NordPass is updated to fix the issue.
1. Check For Typing Errors
Start with the basics. Ensure that you’re entering your Master Password correctly. Check for any typing errors, ensure Caps Lock is off, and verify that your keyboard layout hasn’t changed.
2. Use The Correct Master Password
Remember that the Master Password you set for NordPass is not the same as the password you use for your Nord account or any other service.
Ensure you’re using the specific Master Password you created for NordPass.
3. Reset Your Master Password With Recovery Code
If you’ve forgotten your Master Password but have your Recovery Code, you can reset it. Click on the “Forgot Master Password?” link and enter your 24-symbol Recovery Code to reset it.
- Open NordPass Application: Launch the NordPass application on your device where you normally access your vault.
- Navigate to Login Screen: If you’re not already at the login screen, make sure to navigate there.
- Select Forgot Master Password: On the login screen, you should see an option that says “Forgot Master Password?”. Click on this link.
- Enter Recovery Code: You will be prompted to enter your Recovery Code. This is a 24-symbol code that you should have saved when you first set up your NordPass account.
- Reset Master Password: After entering the Recovery Code, you will be given the option to create a new Master Password. Choose a strong and memorable password.
- Confirm the Reset: Follow any additional prompts to confirm the reset of your Master Password. This might include verifying the change via email or another form of verification.
- Log In with New Master Password: Once your Master Password has been reset, you can log in using the new Master Password.
4. Ensure NordPass Is Updated
Using the latest version of NordPass ensures you have all the bug fixes and improvements. Check for any available updates and install them.
5. Check Keyboard Settings
If you’re using a different keyboard layout (e.g., QWERTY vs. AZERTY), your input might not be recognized as you intend. Ensure your keyboard settings match the layout you used when creating your Master Password.
6. Try A Different Browser Or Device
Attempt to log in to NordPass using a different browser or device. If it works on one platform and not another, the issue might be with the browser or device where the password isn’t working. This can help you isolate the problem and determine if it’s specific to your initial browser or device.
7. Check For Interference From Antivirus Or Firewall
Your antivirus or firewall settings could potentially be blocking NordPass. Temporarily disable these programs to see if that allows you to log in. If it does, you’ll need to add NordPass as an exception within these security programs.
Disable Antivirus Software:
- Locate the Antivirus Icon:
- Find the antivirus icon on your taskbar (usually at the bottom-right corner of the screen on Windows, or the top-right on macOS).
- Access Antivirus Settings:
- Right-click on the antivirus icon to open the context menu.
- Look for options such as “Pause protection,” “Disable protection,” or “Turn off.”
- Choose How Long to Disable Antivirus:
- Some antivirus programs will ask you how long you want to disable protection. Choose the shortest time necessary for your troubleshooting.
- Confirm the Action:
- You may need to confirm that you want to disable the antivirus. Confirm the action if prompted.
Disable Firewall:
- Open Control Panel (Windows):
- Press the Windows key or click the Start button.
- Type “Control Panel” and press Enter.
- Go to “System and Security” and then “Windows Defender Firewall.”
- Turn Windows Defender Firewall Off (Windows):
- Click on “Turn Windows Defender Firewall on or off” on the left-hand side.
- Select “Turn off Windows Defender Firewall” for both private and public network settings.
- Click “OK” to save the changes.
- System Preferences (macOS):
- Click on the Apple menu and select “System Preferences.”
- Click on “Security & Privacy” and then the “Firewall” tab.
- Disable Firewall (macOS):
- Click the lock icon at the bottom left to make changes (you might need to enter your administrator password).
- Click “Turn Off Firewall” to disable it.
8. Use Incognito Or Private Mode
Try logging into NordPass using your browser’s incognito or private mode. This can help bypass issues related to extensions or cookies that might be present in your regular browsing session.
9. Verify Time And Date Settings
Incorrect time and date settings on your device can cause issues with secure connections, which may affect logging into NordPass. Ensure your device’s time and date are set correctly, preferably by enabling automatic synchronization with internet time servers.
For Windows PC:
- Open Settings:
- Right-click on the time and date in the taskbar.
- Select “Adjust date/time.”
- Verify Time & Date Settings:
- Ensure the “Set time automatically” and “Set time zone automatically” toggles are switched on.
- If you need to set the time and date manually, turn these toggles off and then click on “Change” under “Set the date and time manually.”
- Adjust Time & Date Manually (if needed):
- Choose the correct date and time, and then click “Change” to save the settings.
For Android Device:
- Open Settings App:
- Swipe down from the top of the screen and tap the gear icon, or find the Settings app in your app drawer.
- Go to Date & Time Settings:
- Scroll down and tap on “System.”
- Tap “Date & time.”
- Automatic or Manual Settings:
- For automatic settings, ensure “Automatic date & time” and “Automatic time zone” are toggled on.
- To set the time and date manually, toggle off “Automatic date & time” and “Automatic time zone,” then tap on “Set date,” “Set time,” or “Select time zone” to adjust manually.
For IPhone:
- Open Settings App:
- Tap on the Settings app from your home screen.
- Go to Date & Time Settings:
- Scroll down and tap on “General.”
- Tap on “Date & Time.”
- Automatic or Manual Settings:
- Toggle “Set Automatically” on for automatic settings.
- If you need to set the date and time manually, toggle “Set Automatically” off, then tap on the date and time to adjust them manually.
10. Contact NordPass Support

If you’ve tried all the above steps and still can’t access your vault, it’s time to reach out to NordPass support.
They can provide additional troubleshooting steps and may have other solutions based on the specifics of your situation. You can contact them through their support page.
