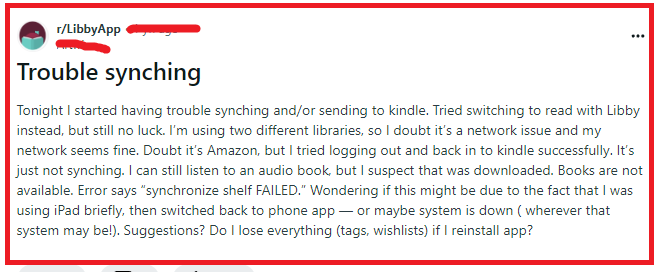
When using the Libby app, a common issue that users may encounter is an error message indicating that synchronizing the shelf has failed.
This synchronization is crucial for maintaining your reading progress, bookmarks, and loans across multiple devices. If you’re facing this problem, then you are not alone!
The full error message will read, “Synchronize shelf FAILED.”
In this article, we will be showing you all the fixes that will help you to fix the issue of “Libby Synchronize Shelf Failed” without any hassle.

How To Fix Libby Synchronize Shelf Failed?
To fix “Libby Synchronize Shelf Failed” you can check the internet connection, manually sync the Shelf and update the Libby app. Additionally, you can also restart the app to fix the issue.
1. Check Your Internet Connection
The first step in troubleshooting any syncing issue is to ensure that your device has a stable internet connection.
Libby requires an active internet connection to sync your shelf with the servers. Check if your device is connected to Wi-Fi or has mobile data enabled. Try opening a webpage or using another app to confirm your internet is working.
You can do a router reset by plugging out the router from the power source and then waiting for 3 minutes and then plugging on the router again.
2. Manually Sync Your Shelf
Sometimes, manually triggering a sync can resolve the issue by following the steps below.
- Go to your Shelf in the navigation footer.
- Tap on “Actions.”
- Select “Synchronize Shelf“.
3. Update The Libby App

Outdated versions of the app can lead to syncing problems. Check the app store on your device for any available updates for Libby and install them.
Developers often release updates to fix bugs and improve performance.
4. Restart The Libby App
Closing and reopening the app can sometimes fix minor glitches:
- Close the Libby app completely. On iOS, double-click the Home button and swipe the app away. On Android, use the “Recent Apps” button and swipe the app off the screen.
- Reopen the app and try to sync again.
5. Log Out And Log Back In
Logging out of your account and logging back in can help reset your connection to Libby’s servers:
- Go to “Menu” in the app.
- Tap on “Library Cards” and then select “Sign Out” or “Remove Card.”
- Add your card back to the app and attempt to sync your shelf.
6. Clear Libby App Cache And Data
Clearing the cache and data can resolve issues caused by corrupted files:
- Navigate to your device’s “Settings.”
- Go to “Apps” or “Application Manager.”
- Find and select “Libby.”
- Tap on “Storage” and then “Clear Cache” and “Clear Data.”
Note: For iOS users, you will need to delete and reinstall the Libby app to clear its data.
7. Uninstall And Reinstall The Libby App
If clearing the cache doesn’t work, try uninstalling and reinstalling the app. This can resolve deeper issues by removing any corrupted files and starting fresh:
- For Android, go to “Settings” > “Apps” or “Application Manager,” find Libby, and choose “Uninstall.”
- For iOS, press and hold the Libby app icon, then select “Remove App” or “Delete App.”
After uninstalling, go to the Google Play Store or Apple App Store, download, and install the latest version of the Libby app. Once reinstalled, log in with your library card details and try to sync your shelf again.
8. Check Your Device’s Time And Date Settings
Incorrect time and date settings on your device can also cause syncing problems. Ensure your device’s settings are correct:
- For Android, go to “Settings” > “System” > “Date & time” and enable “Automatic date & time.”
- For iOS, navigate to “Settings” > “General” > “Date & Time” and toggle on “Set Automatically.”
9. Contact Libby Support
If you’ve tried all the above steps and still encounter the “synchronize shelf failed” error, it may be time to reach out for help:
- Within the Libby app, go to “Menu” > “Get Some Help” > “Contact Support.”
- Provide a detailed description of the issue, what you’ve tried, and any error messages you’ve seen.
