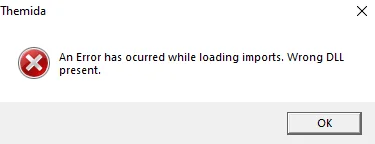
Are you encountering the frustrating “An error has occurred while loading imports. Wrong DLL present” message?
This common error can be a roadblock to launching various applications or games, causing inconvenience and hindering your experience.
The full error message says-“An Error has occurred while loading imports. Wrong DLL present.“
In this blog, we will explore practical steps to troubleshoot and fix the “wrong DLL present” error, empowering you to overcome this obstacle and return to seamless usage of your favorite programs.

How To Fix An Error Has Occurred While Loading Imports. Wrong Dll Present?
To fix An error has occurred while loading imports, you can delete the required files, update or reinstall Visual C++ Redistributable Packages. and update Windows. Moreover, you may also run a system file checker, and perform a clean boot.
Below is a detailed explanation of all the above-mentioned fixes:
1. Delete The Required Files
To address the “An error has occurred while loading imports. Wrong DLL present” issue related to MegaHack, you can follow these additional steps:
- Navigate to Game Files: Go to the installation directory of the affected game in the Program Files folder.
- Locate and Delete Files: Within the game’s directory, locate and delete the following files:
- hackpro.dll
- hackproldr.dll
3. Verify the Error is Resolved: After deleting these files, attempt to launch the game again and verify if the “Wrong DLL present” error is resolved.
2. Update Or Reinstall Visual C++ Redistributable Packages
Certain applications rely on specific versions of Visual C++ Redistributable Packages. Visit the official Microsoft website to download and install the required packages or update existing ones.
To update or reinstall Visual C++ Redistributable Packages, you can follow these steps:
- Start by identifying the Visual C++ Redistributable Packages that are currently installed on your system. You can find these in the list of installed programs in the Control Panel on Windows.
- To update or reinstall a specific package, open the Control Panel, navigate to “Programs” or “Programs and Features,” and locate the specific Visual C++ Redistributable Package. Right-click on it and select “Uninstall.“
- Visit the official Microsoft website to obtain the latest versions of the Visual C++ Redistributable Packages. Ensure that you download the correct package version for your system architecture (32-bit or 64-bit) and the specific version required by the application.
- Once downloaded, run the installer for each package to install the latest versions.
- After installing the new packages, restart your computer to ensure that the changes take effect.
3. Update Windows
Ensure that your Windows operating system is up to date. Check for and install any available Windows updates, as these updates may include fixes for DLL-related issues.
To update Windows, follow these steps:
- Click on the Start menu, then select the gear icon to open “Settings.”
- In the Settings window, click on “Update & Security.” This will open the Windows Update section.
- Within the Windows Update section, click on the “Check for updates” button. Windows will then search for available updates for your system.
- If updates are found, click on the “Download” or “Download and install” button to initiate the update process.
- After the updates are installed, you will typically be prompted to restart your computer to apply the changes.
4. Run System File Checker (SFC)
Open Command Prompt as an administrator and run the “sfc /scannow” command. This will scan and repair corrupted system files that may be contributing to the DLL-related error.
To run the System File Checker (SFC) tool on Windows, follow these steps:
- Right-click on the Start button and select “Windows Terminal (Admin)” or “Command Prompt (Admin)” from the menu. If using Windows 11 or Windows 10, you can also search for “Command Prompt,” right-click on it, and select “Run as administrator.”
- In the Command Prompt window, type the following command and press Enter:
sfc /scannow- The SFC tool will begin scanning your system files for any issues or corruptions. This process may take some time, so be patient and avoid interrupting it.
- Once the scan is complete, the SFC tool will provide a report on any issues found and whether it was able to repair them.
- After the scan is complete, restart your computer to apply any repairs that were made.
5. Perform A Clean Boot
Temporarily disable startup programs and non-essential services using the System Configuration tool. This can help identify if a third-party application or service is causing the DLL-related error.
To perform a clean boot on a Windows system, follow these steps:
- Press the Windows Key + R to open the Run dialog, then type “msconfig” and press Enter. This will open the System Configuration utility.
- In the System Configuration window, navigate to the “Services” tab.
- Check the box next to “Hide all Microsoft services.” This step is important to prevent essential Windows services from being disabled.
- Next, go to the “Startup” tab and click on “Open Task Manager.” In the Task Manager window, disable startup items that are not essential for the system to function.
- After making these changes, restart your computer. It will now start with a clean boot environment, with only essential services and programs running.
