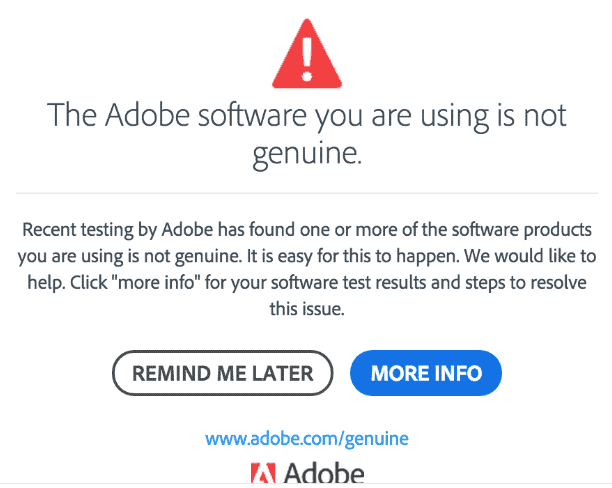
Are you getting Adobe is not genuine error in your MAC or Windows OS and wondering how to disable it?
The Warning message appears Because of the Adobe Genuine Software Integrity Service installed in your system.
The Service checks your Creative Cloud software, and if it finds any suspicious signs about Adobe, it displays the following error message “The Adobe software you are using is not genuine.”
In this article, you will find a way to easily disable the Warning notification without the help of experts hand.
What Is Adobe Genuine Software Integrity Service?

As the software usage grows, so does the demand increases the stronger property protection for technologies. As a result, Adobe has begun to investigate whether an installed product is genuine.
Adobe has released the Adobe Genuine Service (AGS), which is a service that checks if Adobe apps on your PC are legitimate and warns you if they are not.
Why Does Adobe Genuine Software Integrity Service Warning Message Appear?
If you see Adobe’s Genuine Software Integrity Service message means Adobe has assumed that your software has been modified or hacked, your key or account has been reported stolen or blocked, and the user has violated the licensing conditions.
If you haven’t purchased the Adobe software from the Official website or if you are using the Pirated version of Adobe software, then there is a higher chance that you are considered as you are not using Legitimate Adobe Software, and the Service displays the message.
How To Disable Adobe Genuine Software Integrity Service?
There are several ways to disable the appearance of Adobe Genuine Software Integrity Service. Let’s see the steps one by one.
Before troubleshooting, we recommend downloading and installing the software from the Official Adobe website and purchasing the license if not.
It will help you to stop the warning message appears again.
Method 1: Disable Via Services App On Windows

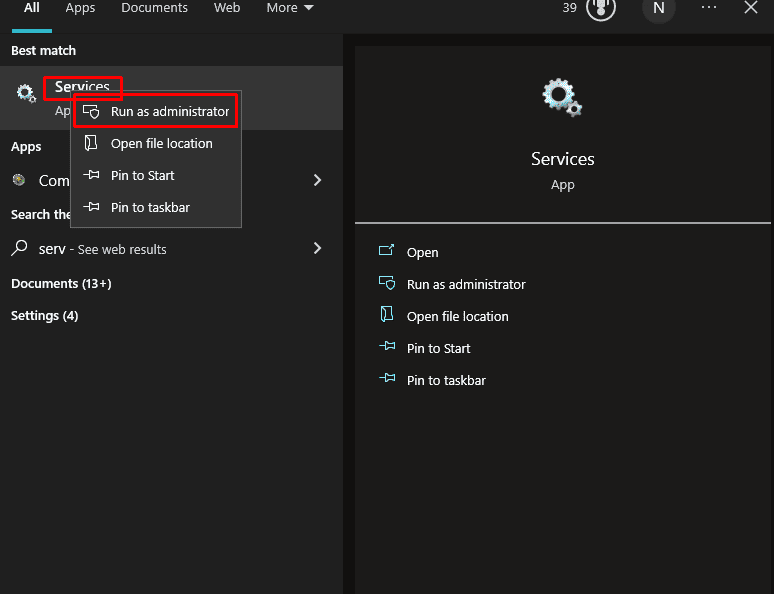
- Type Services in the Search bar in Windows and Double Click on Services App from the List
- Services Window box will open where you will see the listed Windows Services.
- Click On the Standard tab at the bottom of the Service Window
- Find and Locate Adobe Genuine Software Integrity Service from the service Lists and right-click on it.
- Click on Properties from the Opened Context menu.
- Properties window will open; under the General tab, change the startup type to Disabled and tap the Apply button.
- Now restart your system and Launch the Adobe software to see whether the error is gone.
Method 2: Disable Adobe Genuine Software Integrity Service Through Task Manager On Windows

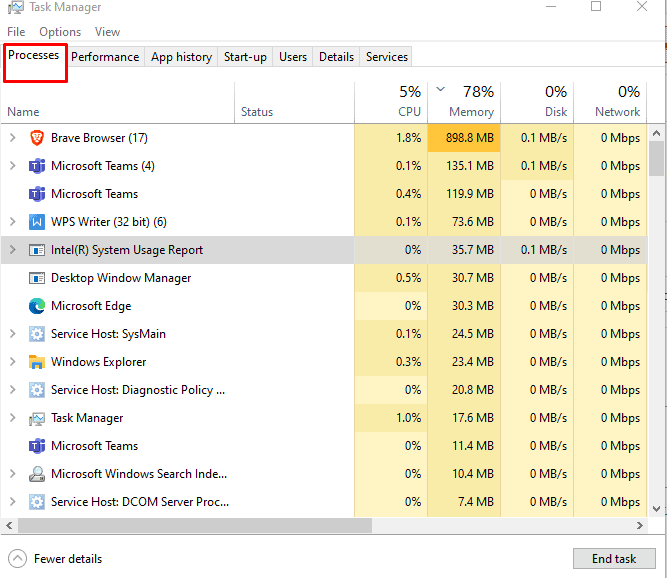
- Press Ctrl+Shift+Esc from the keyboard to open Task Manger in Windows.
- Under the Process tab, search and Find AGS service
- Right Click on AGS service and Click on Open File Location from the Context menu
- Leave the opened folder path open.
- Again, Go to the Task Manager and click on End Task by again right click on AGS service.
- Now Close the Task Manager and Delete the AdobeGCClient folder in the opened file location
Restart your PC and see if the issue is fixed. You can also follow the Next alternative method to disable the Service.
Method 3: Disable, The AGS Warning Message, Using Windows Terminal

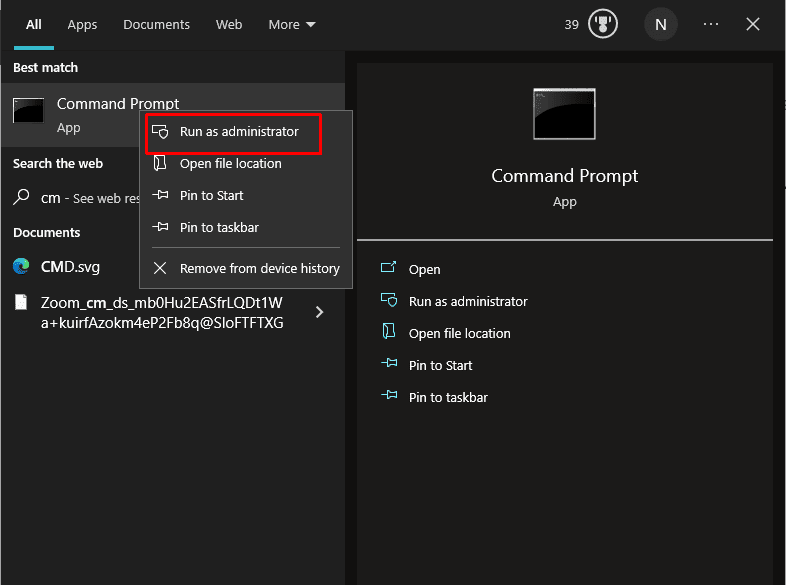
- Type cmd in the Windows search box, right-click on the CMD app and Click on Run as administrator (depending on the OS version).
- In the Command Prompt workspace. Type sc deletes AGService and presses Enter.
Then Manually delete the Adobe GCClient.
- Go to path C:\Program Files (x86)\Common Files\Adobe\AdobeGCClient
- Delete the AdobeGCClient folder.
- Restart your PC and Launch the Adobe program.
Now you can use the Adobe software without any errors.
If you are using MAC OS, delete the AdobeGCClient from Adobe folder.
- Open the Finder app next to the Apple Icon
- In the top navigation bar, Click the Go option and tap the Go to Folder option in the Menu box.
- Click on Application Support and Click On Adobe
- Now Find and Delete the AdobeGCClient folder and Remove it from the Trash.
- Restart your MAC OS and Launch the Adobe application.
The error will be resolved, and now you can work on your CC software without any issues.
