Instagram is a popular social media platform for sharing and connecting with friends. With millions of users and over a billion daily active users, Instagram has been able to gain a lot of traction in the social media world.
If you’re looking to stand out from the crowd, then you might want to try red filter on your Instagram reels/ posts.
If you are looking to gain more followers, Instagram followers, and increase the engagement of your posts and photos, you should use filters to improve your content.
This article will teach you how to use red filter on Instagram.
What Is Red Filter On Instagram?
Red filter on Instagram transmits red light and absorbs other colours. Your post/ story/ reels will be of red color. Red filter filters the light and allows only the red light to pass through it.
There are different types of red filter, try one by one and after finalising one, use that in your videos.
So, when you look at filter from the other side all you see is red light and hence the filter itself looks red.
You can share Red filter reels with your friends and family or to your Instagram followers.
How To Use Red Filter On Instagram?
Steps to use red filter on Instagram:
Step 1: Open Instagram App
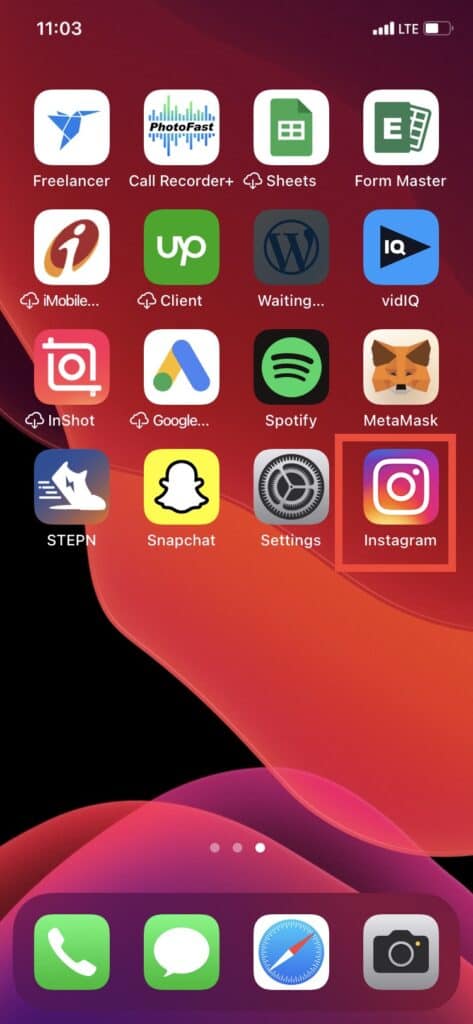
Open the Instagram app and login with your credentials.
Step 2: Click On ‘+’ In Top Left Corner

After login into Instagram app with your credential, Tap on the ‘+’ icon in top left corner to make video using red filter.
Step 3: Switch From STORY To REEL
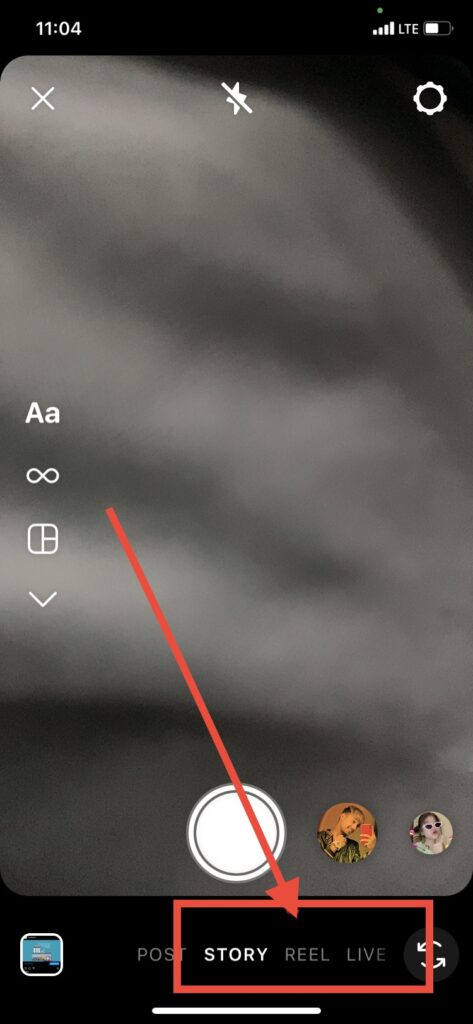
After clicking on ‘+’ icon, camera will be open. Now by default camera is opened for STORY.
Switch from STORY to REEL by clicking on REEL in bottom.
Step 4: Tap On “Effects”
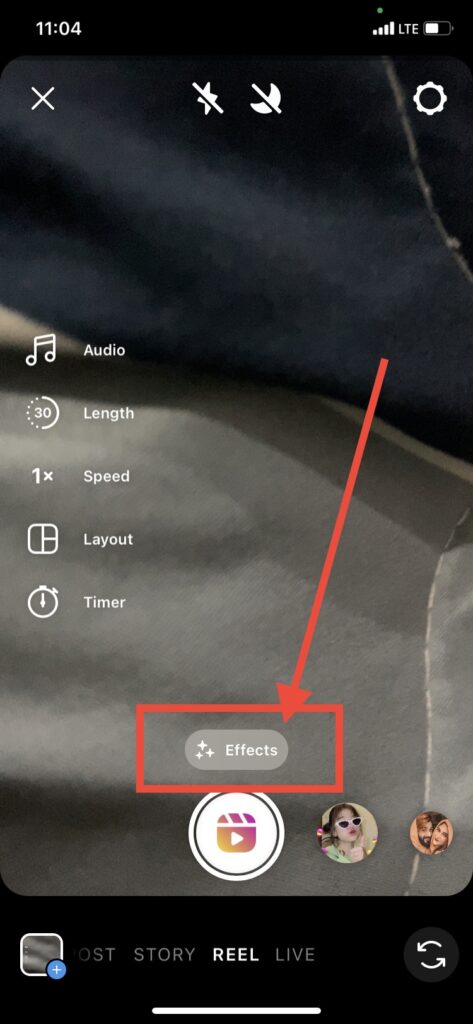
After clicking on REEL, now click on ‘Effects‘ to find the red filter.
Step 5: Search “red Filter”
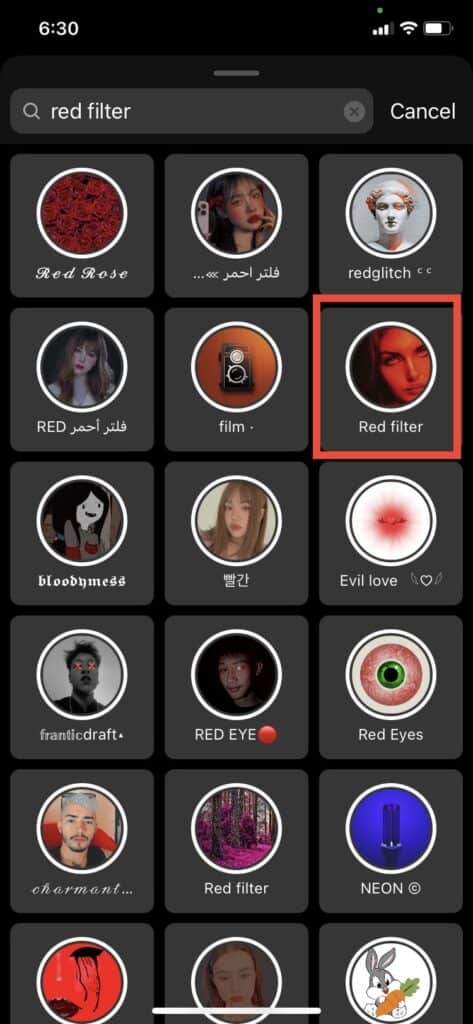
After clicking on ‘Effects‘, a search bar will open where you can search which effect you want to use in your Instagram Reels.
Search ‘red filter’ in the search bar to get the red filter.
You will get many red filter. Explore one by one which one you want to use. Finalise one and share reel with that.
After that click on video, to apply the red filter.
Step 6: Record Video By Clicking On Record Button
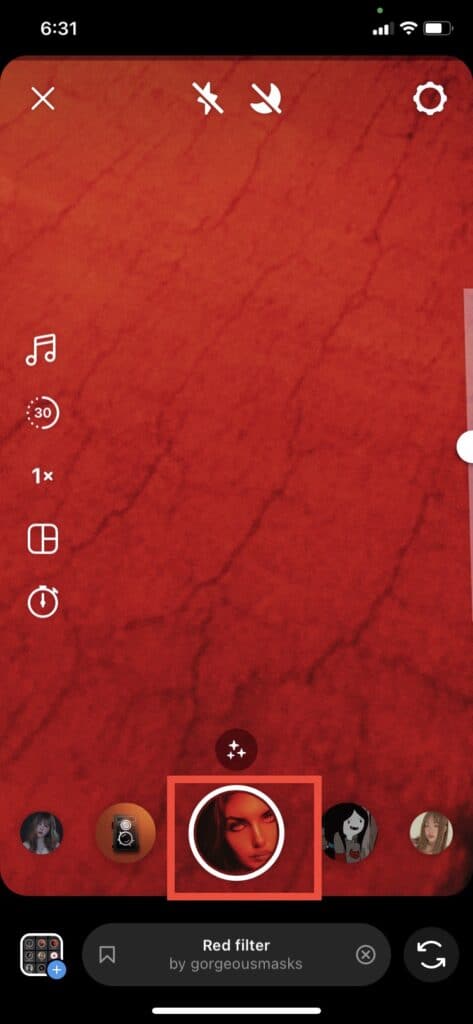
After finalising the red filter, click on that filter. After cling on that filter, that red filter effect will be enabled in camera. Now, make reels and reels will be created with red filter.
Step 7: Click On Next
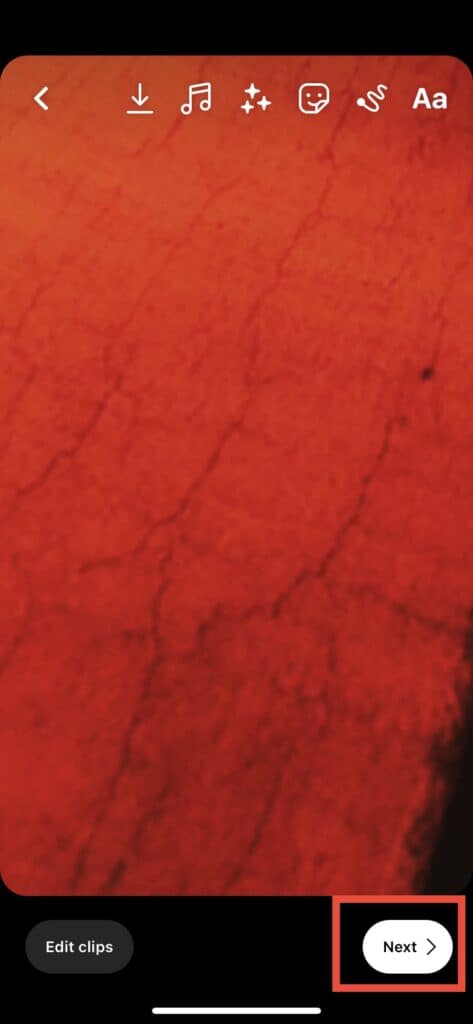
After creating the real, click on next button. After clicking on next button, you can edit the video if you want.
If you don’t want to edit or after editing the video click on next button again.
Step 8: Share The Video
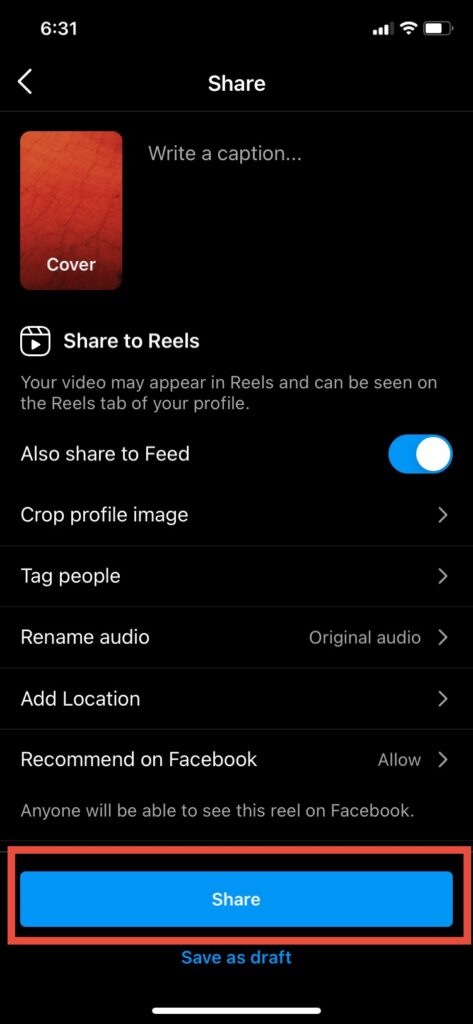
After creating and editing the video, video is finally available to share. Now you can write the caption what you want to write.
You can also share in the feed also if you want. You can tag the people in this video, rename the video or add location also if you want.
After that finally click on share button. Your video/ reels will posted on Instagram with red filter.
Also Read: How to See Who Someone Recently Followed on Instagram?
Red Filters Not Showing In Instagram App
If red filters not showing in your Instagram app, you make sure you have latest version of Instagram app. If not, Update your Instagram App to latest version.
Another way to fix if Red filter not showing is to clear the Instagram app cache or install and reinstall the app.
Conclusion
Now that you know how to use a red filter on Instagram, it’s time to start using it! If you’re looking to stand out from the crowd, then you might want to try red filter on your Instagram reels/ posts. use it to gain more followers, go viral.


